|
|
| Linha 18: |
Linha 18: |
|
| |
|
| <center> | | <center> |
| =Nível 1 ao 30=
| | {| class="wikitablew-tr mw-collapsible mw-collapsed" style="width:80%" ; |
| {| class="mw-collapsible mw-collapsed" style="background-color:#ffffff; width:100%" | | ! colspan="7" style="background-color:#d5e3ff;" |Nv. 1 à 50 |
| ! style="background-color:#c8db93" | <big> </big> | |
| |- | | |- |
| | | | ! style="background-color:#d5e3ff; text-align: center; width:10%" |Nível |
| === Formigueiro Infernal (anthell01) === | | ! style="background-color:#d5e3ff; text-align: center; width:10%" |Onde Upar |
| | ! colspan="5" style="background-color:#d5e3ff; text-align: center;" |Mobs |
| | |- |
| | |
| | '''Caso você tenha o item {{Item List4|id=412|item=Medicina Milagrosa|simple=yes}} é possível chegar no nível de base 100+ rápidamente.''' |
|
| |
|
| * No Formigueiro você pode focar nos Ovos, além de terem um spawn rápido, eles não são agressivos o que facilita bastante pra quem não pode receber muito dano. Depois de upar um pouco nos ovos você poderá se aventurar pelo formigueiro e começar a caçar as Formigas.
| | ! rowspan="2" |1 ~ 50 |
|
| | ! Campo de Aprendiz |
| {| class="wikitablew-tr" style="width:30%; text-align:center"
| | | style="vertical-align:bottom; text-align:center" |{{Monstro|id=1002|monstro=<br>Poring}}{{monster|id=1002 Poring}} |
| !MAPA
| | | style="vertical-align:bottom; text-align:center" | {{Monstro|id=1063|monstro=<br>Lunático}}{{monster|id=1063 Lunático}} |
| !Imagem
| | | colspan="3" | |
| !Nível
| |
| !Nome
| |
| |- | |
| ! rowspan="5" |[[Arquivo:Anthell01.png|200x200px|Formigueiro Infernal 1|centro]]
| |
| |{{Monstro |id=1097}} | |
| |28
| |
| |{{monster|id=1097 Ovo de Andre}}
| |
| |- | | |- |
| |{{Monstro |id=1105}} | | !Formigueiro Infernal |
| |31 | | | style="vertical-align:bottom; text-align:center" |{{Monstro|id=1097|monstro=<br>Ovo de Andre}}{{monster|id=1097 Ovo de Andre}} |
| |{{monster|id=1105 Deniro}} | | | style="vertical-align:bottom; text-align:center" |{{Monstro|id=1105|monstro=<br>Deniro}}{{monster|id=1105 Deniro}} |
| |- | | | style="vertical-align:bottom; text-align:center" |{{Monstro|id=1160|monstro=<br>Piere}}{{monster|id=1160 Piere}} |
| |{{Monstro |id=1160}} | | | style="vertical-align:bottom; text-align:center" |{{Monstro|id=1095|monstro=<br>Andre}}{{monster|id=1095 Andre}} |
| |32
| | | style="vertical-align:bottom; text-align:center" |{{Monstro|id=1176|monstro=<br>Vitata}}{{monster|id=1176 Vitata}} |
| |{{monster|id=1160 Piere}}
| |
| |- | |
| |{{Monstro |id=1095}} | |
| |33
| |
| |{{monster|id=1095 Andre}}
| |
| |- | |
| |{{Monstro |id=1176}} | |
| |35
| |
| |{{monster|id=1176 Vitata}}
| |
| |} | | |} |
|
| | |
| ===Caverna de Payon (pay_dun00) ===
| | {| class="wikitable mw-collapsible mw-collapsed wikitablew-tr" style="width:80%" ; |
| *Uma segunda opção é ir para a Caverna de Payon 1º andar, se você começou com um Noviço, você pode usar Cura para matar os Mortos-vivos que estão aqui, mas terá que fugir dos familiares.
| | ! colspan="5" style="background-color:#d5e3ff;" |Nv. 50 à 70 |
| {| class="wikitablew-tr" style="width:30%; text-align:center" | |
| !MAPA
| |
| !Imagem
| |
| !Nível
| |
| !Nome
| |
| |- | | |- |
| ! rowspan="5" |[[Arquivo:Pay dun00.png|Caverna de Payon 0|centro]] | | ! style="background-color:#d5e3ff; text-align: center; width:10%" |Nível |
| |{{Monstro |id=1015}}
| | ! style="background-color:#d5e3ff; text-align: center; width:10%" |Onde Upar |
| |17
| | ! colspan="3" style="background-color:#d5e3ff; text-align: center;" |Mobs |
| |{{monster|id=1015 Zumbi}} | |
| |- | | |- |
| |{{Monstro |id=2606}} | | ! rowspan="2" |50 ~ 70 |
| |17 | | !Caverna dos Orcs 2 |
| |{{monster|id=2606 Zumbi Feroz}} | | | style="vertical-align:bottom; text-align:center" |{{Monstro|id=1152|monstro=<br>Orc Esqueleto}}{{monster|id=1152 Orc Esqueleto}} |
| | | style="vertical-align:bottom; text-align:center" |{{Monstro|id=1177|monstro=<br>Zenorc}}{{monster|id=1177 Zenorc}} |
| | | style="vertical-align:bottom; text-align:center" |{{Monstro|id=1153|monstro=<br>Orc Zumbi}}{{monster|id=1153 Orc Zumbi}} |
| |- | | |- |
| |{{Monstro |id=1005}} | | !Deserto de Sograt 16 |
| |24
| | | style="vertical-align:bottom; text-align:center" |{{Monstro|id=1119|monstro=<br>Frilldora}}{{monster|id=1119 Frilldora}} |
| |{{monster|id=1005 Familiar}}
| | | style="vertical-align:bottom; text-align:center" |{{Monstro|id=1165|monstro=<br>Arenoso}}{{monster|id=1165 Arenoso}} |
| |- | | | style="vertical-align:bottom; text-align:center" |{{Monstro|id=1127|monstro=<br>Hode}}{{monster|id=1127 Hode}} |
| |{{Monstro |id=1076}} | |
| |27
| |
| |{{monster|id=1076 Esqueleto}}
| |
| |- | |
| |{{Monstro |id=1031}} | |
| |30
| |
| |{{monster|id=1031 Poporing}}
| |
| |} | | |} |
| |} | | |
| *
| | A partir do 70+, você pode ir upar na '''Turn-in''', além de upar fazendo as quests, você vai poder farmar itens cujo se encontram listados aqui:[[Grupo_do_Éden|clique aqui]] |
|
| | |
| =Nível 30 ao 70=
| | A partir do nível 130+ você pode ir para '''Caverna de Magma 3 (mad_dun03)''' pelo '''Teleportador''' utilizando a opção Calabouços > Magma Dungeon > Magma Dungeon 3 |
| {| class="mw-collapsible mw-collapsed" style="background-color:#ffffff; width:100%" | | |
| ! style="background-color:#c8db93" |<big> </big> | | {| class="wikitable mw-collapsible mw-collapsed wikitablew-tr" style="width:80%" ; |
| | ! colspan="8" style="background-color:#d5e3ff;" |Nv. 130 à 170 |
| |- | | |- |
| | | | ! style="background-color:#d5e3ff; text-align: center; width:10%" |Nível |
|
| | ! style="background-color:#d5e3ff; text-align: center; width:10%" |Onde Upar |
| ===Caverna dos Orcs (orcsdun01/02)===
| | ! colspan="6" style="background-color:#d5e3ff; text-align: center;" |Mobs |
|
| |
| *Se você possui habilidades em área se dará bem na Caverna dos Orcs 1º Andar, caso você seja um pouco mais forte, vá para o 2º Andar e mate Zenorcs.
| |
| {| class="wikitablew-tr" style="width:30%; text-align:center"
| |
| !MAPA
| |
| !Imagem
| |
| !Nível
| |
| !Nome
| |
| |- | | |- |
| ! rowspan="4" |[[Arquivo:Orcsdun01.png|Caverna dos Orcs 1|centro]][[Arquivo:Orcsdun02.png|centro|Caverna dos Orcs 2]] | | ! rowspan="2" |130~170 |
| |{{Monstro |id=1153}} | | !Large Bath |
| |51 | | | style="vertical-align:bottom; text-align:center" |{{Monstro|id=20644|monstro=<br>Boiled Water Marc}}{{monster|id=20644 Boiled Water Marc}} |
| |{{monster|id=1153 Orc Zumbi}} | | | style="vertical-align:bottom; text-align:center" |{{Monstro|id=20645|monstro=<br>Boiled Water Swordfish}}{{monster|id=20645 Boiled Water Swordfish}} |
| | | style="vertical-align:bottom; text-align:center" |{{Monstro|id=20646|monstro=<br>Boiled Water Piranha}}{{monster|id=20647 Boiled Water Piranha}} |
| | | style="vertical-align:bottom; text-align:center" |{{Monstro|id=20643|monstro=<br>Boiled Water Phen}}{{monster|id=20643 Boiled Water Phen}} |
| | | style="vertical-align:bottom; text-align:center" |{{Monstro|id=20633|monstro=<br>Broken Cleaner}}{{monster|id=20633 Broken Cleaner}} |
| | | style="vertical-align:bottom; text-align:center" |{{Monstro|id=20634|monstro=<br>Broken Cleaner}}{{monster|id=20634 Broken Cleaner}} |
| |- | | |- |
| |{{Monstro |id=2723}} | | !Illusion of Underwater 01 |
| |51 | | (Quests e Mobs) |
| |{{monster|id=2723orc Zumbi Fulgaz}} | | | style="vertical-align:bottom; text-align:center" |{{Monstro|id=20801|monstro=<br>Deep Sea Sropho}}{{monster|id=20801 Deep Sea Sropho}} |
| | | style="vertical-align:bottom; text-align:center" |{{Monstro|id=20805|monstro=<br>Deep Sea Merman}}{{monster|id=20805 Deep Sea Merman}} |
| | | style="vertical-align:bottom; text-align:center" |{{Monstro|id=20802|monstro=<br>Deep Sea Obeaune}}{{monster|id=20802 Deep Sea Obeaune}} |
| | | style="vertical-align:bottom; text-align:center" |{{Monstro|id=20804|monstro=<br>Deep Sea Marse}}{{monster|id=20804 Deep Sea Marse}} |
| | | style="vertical-align:bottom; text-align:center" |{{Monstro|id=20803|monstro=<br>Deep Sea Deviace}}{{monster|id=20803 Deep Sea Deviace}} |
| |- | | |- |
| |{{Monstro |id=1152}}
| |
| |53
| |
| |{{monster|id=1152 Orc Esqueleto}}
| |
| |-
| |
| |{{Monstro |id=1177}}
| |
| |53
| |
| |{{monster|id=1177 Zenorc}}
| |
| |}
| |
| *
| |
| |} | | |} |
| =Nível 70 ao 100=
| | |
| {| class="mw-collapsible mw-collapsed" style="background-color:#ffffff; width:100%"
| | A partir do nível 170+ você pode realizar as instâncias '''Old Glast Heim Challenge''' e '''Edda Bio Lab''' pelo '''gerenciador de instâncias'''. ('''Não esqueça de dar o @classe no nível 200''') |
| ! style="background-color:#c8db93" |<big> </big>
| | |
| |-
| | {| class="wikitable mw-collapsible mw-collapsed wikitablew-tr" style="width:80%" ; |
| |
| | ! colspan="10" style="background-color:#d5e3ff;" |Nv. 170 à 180 |
|
| |
| ===Gramps (Turn-In bRO/iRO)===
| |
| A Partir do nível 70, você poderá pegar as quests de Caça com o Mateus Além no [[Grupo do Éden|Grupo Éden]]. | |
|
| |
| *A vantagem de UP na Turn-In é que é possível obter {{ItemB|id=6495}} '''Medalhas de Mérito''' e trocar por alguns itens na [[Grupo do Éden#Loja de Mérito|Loja de Mérito]]
| |
|
| |
| {| class="wikitablew-tr" style="width:30%; text-align:center" | |
| ! colspan="4" |bRO | |
| |-
| |
| !MAPA
| |
| !Imagem
| |
| !Nível
| |
| !Nome
| |
| |-
| |
| ! rowspan="2" |[[Arquivo:Pay dun00.png|200x200px|Réplica da Caverna de Payon|centro]]
| |
| |{{Monstro |id=1405}}
| |
| |98
| |
| |{{monster|id=1405 Tengu}}
| |
| |-
| |
| |{{Monstro |id=1692}}
| |
| |92
| |
| |{{monster|id=1692 Breeze}}
| |
| |- | | |- |
| ! colspan="4" |iRO | | ! style="background-color:#d5e3ff; text-align: center; width:10%" |Nível |
| | ! style="background-color:#d5e3ff; text-align: center; width:10%" |Onde Upar |
| | ! colspan="8" style="background-color:#d5e3ff; text-align: center;" |Mobs |
| |- | | |- |
| !MAPA | | !rowspan="3" |170 à 180 |
| !Imagem | | !Illusion of Labyrinth |
| !Nível
| | (Lembre-se de pegar a quest no livro de ouro) |
| ! Nome
| | | style="vertical-align:bottom; text-align:center" |{{Monstro|id=20532|monstro=<br>Chaotic Stem Worm}}{{monster|id=20532 Chaotic Stem Worm}} |
| | | style="vertical-align:bottom; text-align:center" |{{Monstro|id=20529|monstro=<br>Chaos Ghostring}}{{monster|id=20529 Chaos Ghostring}} |
| | | style="vertical-align:bottom; text-align:center" |{{Monstro|id=20531|monstro=<br>Chaos}}{{monster|id=20531 Chaos}} |
| | | style="vertical-align:bottom; text-align:center" |{{Monstro|id=20528|monstro=<br>Chaos Mantis}}{{monster|id=20528 Chaos Mantis}} |
| | | style="vertical-align:bottom; text-align:center" |{{Monstro|id=20527|monstro=<br>Chaos Hunter Fly}}{{monster|id=20527 Chaos Hunter Fly}} |
| | | style="vertical-align:bottom; text-align:center" |{{Monstro|id=20526|monstro=<br>Chaos Side Winder}}{{monster|id=20526 Chaos Side Winder}} |
| | | style="vertical-align:bottom; text-align:center" |{{Monstro|id=20525|monstro=<br>Chaos Baphomet Jr.}}{{monster|id=20525 Chaos Baphomet Jr.}} |
| | | style="vertical-align:bottom; text-align:center" |{{Monstro|id=20530|monstro=<br>Chaos Killer Mantis}}{{monster|id=20530 Chaos Killer Mantis}} |
| |- | | |- |
| ! rowspan="2" |[[Arquivo:Pay dun00.png|200x200px|Réplica da Caverna de Payon|centro]] | | !Rachel Oz Gorge |
| |{{Monstro |id=1386}} | | | style="vertical-align:bottom; text-align:center" |{{Monstro|id=21324|monstro=<br>Grey Goat}}{{monster|id=21324 Grey Goat}} |
| |81 | | |{{Monstro|id=21323 |monstro=<br>Rake Hand}}{{monster|id=21323 Rake Hand}} |
| |{{monster | id=1386 Rochoso}} | | |{{Monstro|id=21296 |monstro=<br>Rake Hand}}{{monster|id=21296 Rake Hand}} |
| | | colspan="5" | |
| |- | | |- |
| |{{Monstro |id=1201}} | | !Illusion of Underwater 02 |
| |98 | | (Quests e Mobs) |
| |{{monster | id=1201 Rybio}} | | | style="vertical-align:bottom; text-align:center" |{{Monstro|id=20806|monstro=<br>Deep Sea Sedora}}{{monster|id=20806 Deep Sea Sedora}} |
| | | style="vertical-align:bottom; text-align:center" |{{Monstro|id=20807|monstro=<br>Deep Sea Swordfish}}{{monster|id=20807 Deep Sea Swordfish}} |
| | | style="vertical-align:bottom; text-align:center" |{{Monstro|id=20808|monstro=<br>Deep Sea Strouf}}{{monster|id=20808 Deep Sea Strouf}} |
| | | style="vertical-align:bottom; text-align:center" |{{Monstro|id=20809|monstro=<br>Deep Sea Phen}}{{monster|id=20809 Deep Sea Phen}} |
| | | style="vertical-align:bottom; text-align:center" |{{Monstro|id=20810|monstro=<br> Deep Sea King Dramoh}}{{monster|id=20810 Deep Sea King Dramoh}} |
| | | colspan="3" | |
| |} | | |} |
|
| | |
| ===Caverna das Cataratas (bra_dun01)===
| | {| class="wikitable mw-collapsible mw-collapsed wikitablew-tr" style="width:80%" ; |
| Outra opção, é caçar Espíritos da Água na Caverna das Cataratas.
| | ! colspan="10" style="background-color:#d5e3ff;" |Nv. 180 à 200 |
| {| class="wikitablew-tr" style="width:30%; text-align:center" | |
| !MAPA | |
| !Imagem
| |
| !Nível
| |
| !Nome
| |
| |-
| |
| ! rowspan="3" |[[Arquivo:Bra dun01.png|200x200px|Caverna das Cataratas|centro]]
| |
| |{{Monstro |id=2070}}
| |
| |75
| |
| |{{monster|id=2070 Espírito da Água}}
| |
| |- | | |- |
| |{{Monstro |id=2709}} | | ! style="background-color:#d5e3ff; text-align: center; width:10%" |Nível |
| |75 | | ! style="background-color:#d5e3ff; text-align: center; width:10%" |Onde Upar |
| |{{monster|id=2709 Espírito da Água Ágil}} | | ! colspan="8" style="background-color:#d5e3ff; text-align: center;" |Mobs |
| |- | | |- |
| |{{Monstro |id=2069}} | | !180 à 200 |
| |79 | | !Odin's Past |
| |{{monster|id=2069 Iara}} | | (requer Nv. 170) |
| | | style="vertical-align:bottom; text-align:center" |{{Monstro|id=20604|monstro=<br>Angelgolt}}{{monster|id=20604 Angelgolt}} |
| | | style="vertical-align:bottom; text-align:center" |{{Monstro|id=20605|monstro=<br>Angelgolt}}{{monster|id=20605 Angelgolt}} |
| | | style="vertical-align:bottom; text-align:center" |{{Monstro|id=20606|monstro=<br>Holy Frus}}{{monster|id=20606 Holy Frus}} |
| | | style="vertical-align:bottom; text-align:center" |{{Monstro|id=20607|monstro=<br>Holy Skogul}}{{monster|id=20607 Holy Skogul}} |
| | | style="vertical-align:bottom; text-align:center" |{{Monstro|id=20608|monstro=<br>Arch Plasma}}{{monster|id=20608 Arch Plasma}} |
| | | style="vertical-align:bottom; text-align:center" |{{Monstro|id=20609|monstro=<br>Spectral Plasma}}{{monster|id=20609 Spectral Plasma}} |
| |} | | |} |
| ===Caverna de Magma (mag_dun02)===
| | |
| A Terceira opção para caso você goste de mobar e aguente um pouco mais de porrada é a Caverna de Magma. Você pode upar um pouco na Caverna das Cataratas e seguir para Magdun logo em seguida.
| | A partir do nível 230+ você pode ir para '''Fazenda das Abóboras de Niflheim (nif_fild03)''' pelo '''Teleportador''' utilizando a opção Campos > Campos de Niflheim > Campos de Niflheim 3 |
| {| class="wikitablew-tr" style="width:30%; text-align:center" | | |
| !MAPA
| | {| class="wikitable mw-collapsible mw-collapsed wikitablew-tr" style="width:80%" ; |
| !Imagem
| | ! colspan="7" style="background-color:#d5e3ff;" |Nv. 200 à 240 |
|
| |
| !Nível
| |
| !Nome
| |
| |- | | |- |
| ! rowspan="5" |[[Arquivo:Mag dun02.png|200x200px|Caverna de Magma 2|centro]] | | ! style="background-color:#d5e3ff; text-align: center; width:10%" |Nível |
| |<center>{{Monstro |id=1382}}</center>
| | ! style="background-color:#d5e3ff; text-align: center; width:10%" |Onde Upar |
| |104 | | ! colspan="5" style="background-color:#d5e3ff; text-align: center;" |Mobs |
| |{{monster|id=1382 Biabolik}}
| |
| |- | | |- |
| |<center>{{Monstro |id=1384}}</center> | | !200 à 240 |
| |105
| | !Niflheim Dungeon 01 |
| |{{monster|id=1384 Exterminador}}
| | (requer Nv. 200) |
| |- | | | style="vertical-align:bottom; text-align:center" |{{Monstro|id=20938 |monstro=<br> Ghost Cube}} |
| |<center>{{Monstro |id=1385}}</center> | | | style="vertical-align:bottom; text-align:center" |{{Monstro|id=20939 |monstro=<br> Lude Gal}} |
| |105
| | | style="vertical-align:bottom; text-align:center" |{{Monstro|id=20937 |monstro=<br> Brutal Murderer}} |
| |{{monster|id=1385 Deletério}}
| | | style="vertical-align:bottom; text-align:center" |{{Monstro|id=20935 |monstro=<br> Gan Ceann}} |
| |- | |
| |{{Monstro |id=1379}} | |
| |107 | |
| |{{monster|id=1379Pesadelo Sombrio}}
| |
| |- | |
| |{{Monstro |id=2732}} | |
| |107 | |
| |{{monster|id=2732Pesadelo Sombrio Feroz}}
| |
| |} | | |} |
| *
| | |
| |}
| | {| class="wikitable mw-collapsible mw-collapsed wikitablew-tr" style="width:80%" ; |
| =Nível 101 ao 130=
| | ! colspan="7" style="background-color:#d5e3ff;" |Nv. 240 à 250 |
| {| class="mw-collapsible mw-collapsed" style="background-color:#ffffff; width:100%" | |
| ! style="background-color:#c8db93" | <big> </big> | |
| |-
| |
| |'''Gramps (Turn-In bRO/iRO)'''
| |
|
| |
| A Partir do nível 101, você poderá pegar novas quests de Caça com o Mateus Além no [[Grupo do Éden|Grupo Éden]].
| |
|
| |
| *A vantagem de UP na Turn-In é que é possível obter '''{{ItemB|id=6495}} Medalhas de Mérito''' e trocar por alguns itens na [[Grupo do Éden#Loja de Mérito|Loja de Mérito]]
| |
|
| |
| {| class="wikitablew-tr" style="width:30%; text-align:center"
| |
| ! colspan="4" |bRO
| |
| |-
| |
| !MAPA
| |
| !Imagem
| |
| !Nível
| |
| ! Nome
| |
| |-
| |
| ! rowspan="2" |[[Arquivo:Egef dun03m.png|centro|200x200px|Réplica do Calabouço de Geffen]]
| |
| |{{Monstro |id=1291}}
| |
| |121
| |
| |{{monster | id=1291 Aparição}}
| |
| |-
| |
| |{{Monstro |id=1098}}
| |
| |105
| |
| |{{monster | id=1098 Anubis}}
| |
| |-
| |
| ! colspan="4" |iRO
| |
| |- | | |- |
| !MAPA | | ! style="background-color:#d5e3ff; text-align: center; width:10%" |Nível |
| !Imagem
| | ! style="background-color:#d5e3ff; text-align: center; width:10%" |Onde Upar |
| !Nível | | ! colspan="5" style="background-color:#d5e3ff; text-align: center;" |Mobs |
| ! Nome | |
| |- | | |- |
| ! rowspan="2" |[[Arquivo:Egef dun03m.png|centro|200x200px|Réplica do Calabouço de Geffen]] | | !rowspan="2" |240 ~ 250 |
| |{{Monstro |id=1735}} | | !Clock Tower |
| |115 | | | style="vertical-align:bottom; text-align:center" |{{Monstro|id=20175|monstro=<br>Extra Joker}}{{monster|id=20175 Extra Joker}} |
| |{{monster | id=1735 Alicel}} | | | style="vertical-align:bottom; text-align:center" |{{Monstro|id=20176|monstro=<br>Erzsebet}}{{monster|id=20176 Erzsebet}} |
| | | style="vertical-align:bottom; text-align:center" |{{Monstro|id=20177|monstro=<br>Jennifer}}{{monster|id=20177 Jennifer}} |
| | | style="vertical-align:bottom; text-align:center" |{{Monstro|id=20178|monstro=<br>General Orc}}{{monster|id=20178 General Orc}} |
| | | style="vertical-align:bottom; text-align:center" |{{Monstro|id=20179|monstro=<br>Sieglouse}}{{monster|id=20179 Sieglouse}} |
| |- | | |- |
| |{{Monstro |id=1772}}
| |
| |124
| |
| |{{monster | id=1772 Isilla}}
| |
| |} | | |} |
|
| | |
| ===Illusion of Moonlight (Nível 100) ===
| | {| class="wikitable mw-collapsible mw-collapsed wikitablew-tr" style="width:80%" ; |
| No Nível 100 você poderá realizar as '''Quests Diárias''' da Illusion of Moonlight:
| | ! colspan="7" style="background-color:#d5e3ff;" |Nv. 250 à 260 |
|
| |
| *Stop de Wizard!
| |
| *Remembering My Ancestors!
| |
| *No Mercy for Illusions!
| |
| {| class="wikitablew-tr" style="width:30%; text-align:center" | |
| !Mapa
| |
| !|Imagem | |
| !|Nível
| |
| !Nome
| |
| |-
| |
| ! rowspan="7" |[[Arquivo:Pay d03 i.png|200x200px|Illusion of Moonlight|centro]]
| |
| |{{Monstro |id=3760}}
| |
| |110
| |
| |<span class="plainlinks">[https://www.divine-pride.net/database/monster/3760 Cursed Munak]</span>
| |
| |-
| |
| | {{Monstro |id=3761}}
| |
| |112
| |
| |<span class="plainlinks">[http://www.divine-pride.net/database/monster/3761 Cursed Bongun]</span>
| |
| |-
| |
| |{{Monstro |id=3762}}
| |
| |114
| |
| |<span class="plainlinks">[http://www.divine-pride.net/database/monster/3762 Cursed Sohee]</span> | |
| |- | | |- |
| |{{Monstro |id=3763}} | | ! style="background-color:#d5e3ff; text-align: center; width:10%" |Nível |
| |115 | | ! style="background-color:#d5e3ff; text-align: center; width:10%" |Onde Upar |
| |<span class="plainlinks">[http://www.divine-pride.net/database/monster/3763 Angry Soldier]</span>
| | ! colspan="5" style="background-color:#d5e3ff; text-align: center;" |Mobs |
| |- | | |- |
| |{{Monstro |id=3759}} | | !rowspan="2" |250 à 260 |
| |116 | | !Mjolnir Underground Cave |
| |<span class="plainlinks">[http://www.divine-pride.net/database/monster/3759 Angry Nine Tail]</span> | | (requer Nv. 230) |
| | | style="vertical-align:bottom; text-align:center" |{{Monstro|id=21951|monstro=<br>Punch Bug}}{{monster|id=21951 Punch Bug}} |
| | | style="vertical-align:bottom; text-align:center" |{{Monstro|id=21953|monstro=<br>Dispol}}{{monster|id=21953 Dispol}} |
| | | style="vertical-align:bottom; text-align:center" |{{Monstro|id=21952|monstro=<br>Aferde}}{{monster|id=21952 Aferde}} |
| | | style="vertical-align:bottom; text-align:center" |{{Monstro|id=21954|monstro=<br>Timbers}}{{monster|id=21954 Timbers}} |
| |- | | |- |
| ||{{Monstro |id=3765}} | | !Power Twisted Plains |
| |117 | | (requer Nv. 230) |
| |<span class="plainlinks">[http://www.divine-pride.net/database/monster/3765 Illusion Hero]</span> | | | style="vertical-align:bottom; text-align:center" |{{Monstro|id=21947|monstro=<br>Deadsera}}{{monster|id=21947 Deadsera}} |
| |- | | | style="vertical-align:bottom; text-align:center" |{{Monstro|id=21948|monstro=<br>Hardrock Titan}}{{monster|id=21948 Hardrock Titan}} |
| |{{Monstro |id=3764}} | | | style="vertical-align:bottom; text-align:center" |{{Monstro|id=21949|monstro=<br>Deadween}}{{monster|id=21949 Deadween}} |
| |118 | | | style="vertical-align:bottom; text-align:center" |{{Monstro|id=21946|monstro=<br>Burning Night}}{{monster|id=21946 Burning Night}} |
| |<span class="plainlinks">[http://www.divine-pride.net/database/monster/3764 Wizard of Veritas]</span> | |
| |} | | |} |
| ===Caverna de Magma (mag_dun02)===
| | |
| Você pode retornar a Caverna de Magma para pegar um pouco mais de nível antes de avançar.
| | {| class="wikitable mw-collapsible mw-collapsed wikitablew-tr" style="width:80%" ; |
| {| class="wikitablew-tr" style="width:30%; text-align:center"
| | ! colspan="13" style="background-color:#d5e3ff;" |Nv. 260 à 275 |
| !Mapa
| |
| !Imagem
| |
|
| |
| !Nível
| |
| !Nome
| |
| |-
| |
| ! rowspan="5" |[[Arquivo:Mag dun02.png|200x200px|Caverna de Magma 2]]
| |
| |<center>{{Monstro |id=1382}}</center>
| |
| |104
| |
| |{{monster|id=1382 Diabolik}}
| |
| |-
| |
| |<center>{{Monstro |id=1384}}</center>
| |
| |105
| |
| |{{monster|id=1384 Exterminador}}
| |
| |-
| |
| |<center>{{Monstro |id=1385}}</center>
| |
| |105
| |
| |{{monster|id=1385 Deletério}}
| |
| |-
| |
| |{{Monstro |id=1379}}
| |
| |107
| |
| |{{monster|id=1379Pesadelo Sombrio}}
| |
| |-
| |
| |{{Monstro |id=2732}}
| |
| |107
| |
| |{{monster|id=2732Pesadelo Sombrio Feroz}}
| |
| |}
| |
| ===Illusion of Frozen===
| |
| No Nível 120 você poderá realizar a '''Quest Diária''' da Illusion of Frozen:
| |
|
| |
| *Brides and Jays
| |
|
| |
| {| class="wikitablew-tr" style="width:30%; text-align:center"
| |
| !Mapa
| |
| !|Imagem
| |
| !Nível
| |
| !|Nome
| |
| |-
| |
| ! rowspan="4" |[[Arquivo:Ice d03 i.png|200x200px|Illusion of Frozen]]
| |
| |{{Monstro |id=3792}}
| |
| |126
| |
| |<span class="plainlinks">[https://www.divine-pride.net/database/monster/3792 Furious Gazeti]</span>
| |
| |-
| |
| |{{Monstro |id=3793}}
| |
| |129
| |
| |<span class="plainlinks">[http://www.divine-pride.net/database/monster/3793 Furious Snowier]</span>
| |
| |-
| |
| | {{Monstro |id=3794}}
| |
| |133
| |
| |<span class="plainlinks">[http://www.divine-pride.net/database/monster/3794 Furious Ice Titan]</span>
| |
| |-
| |
| |{{Monstro |id=3795}}
| |
| |135
| |
| |<span class="plainlinks">[http://www.divine-pride.net/database/monster/3795 Furious Iceicles]</span>
| |
| |}
| |
|
| |
| ===Large Bath Meditatio (ba_bath)===
| |
| Ao atingir nível 120, você poderá ir para o Large Bath Maditatio, esse lugar concede uma ótima XP e é um mapa "fácil" de se upar.
| |
| {| class="wikitablew-tr" style="width:30%; text-align:center"
| |
| !Mapa
| |
| !Imagem
| |
| !Nível
| |
| ! Nome
| |
| |-
| |
| ! rowspan="6" |[[Arquivo:Ba bath.png|200x200px|Large Bath Meditatio]]
| |
| |{{Monstro |id=20644}}
| |
| |137
| |
| |{{monster|id=20644 Boiled Water Marc}}
| |
| |-
| |
| |{{Monstro |id=20645}}
| |
| |138
| |
| |{{monster|id=20645 Boiled Water Swordfish}}
| |
| |-
| |
| |{{Monstro |id=20646}}
| |
| |138
| |
| |{{monster|id=20646 Boiled Water Piranha}}
| |
| |-
| |
| |<center>{{Monstro |id=20643}}</center>
| |
| |139
| |
| |{{monster|id=20643 Boiled Water Phen}}
| |
| |-
| |
| |<center>{{Monstro |id=20633}}</center>
| |
| |143
| |
| |{{monster|id=20633 Broken Cleaner}}
| |
| |-
| |
| |<center>{{Monstro |id=20634}}</center>
| |
| |143
| |
| |{{monster|id=20634 Broken Cleaner}}
| |
| |}
| |
| *
| |
| |}
| |
| =Nível 131+=
| |
| {| class="mw-collapsible mw-collapsed" style="background-color:#ffffff; width:100%" | |
| ! style="background-color:#c8db93" | <big> </big>
| |
| |-
| |
| |'''Gramps (Turn-In bRO/iRO)'''
| |
|
| |
| A Partir do nível 131, você poderá pegar novas quests de Caça com o Mateus Além no [[Grupo do Éden|Grupo Éden]].
| |
|
| |
| *A vantagem de UP na Turn-In é que é possível obter {{ItemB|id=6495}} '''Medalhas de Mérito''' e trocar por alguns itens na [[Grupo do Éden#Loja de Mérito|Loja de Mérito]]
| |
|
| |
| {| class="wikitablew-tr" style="width:30%; text-align:center"
| |
| ! colspan="4" |bRO | |
| |-
| |
| !Mapa
| |
| !Imagem
| |
| !Nível
| |
| ! Nome
| |
| |-
| |
| ! rowspan="2" |[[Arquivo:Eabyss 03m.png|centro]]
| |
| |{{Monstro |id=1309}}
| |
| |140
| |
| |{{monster | id=1309 Gajomart}}
| |
| |-
| |
| |{{Monstro |id=2369}}
| |
| |149
| |
| |{{monster | id=2369 Lichtern Kenaz}}
| |
| |-
| |
| ! colspan="4" |iRO
| |
| |-
| |
| !
| |
| !Imagem
| |
| !Nível
| |
| ! Nome
| |
| |-
| |
| ! rowspan="2" |[[Arquivo:Eabyss 03m.png|centro]]
| |
| |{{Monstro |id=1986}}
| |
| |128
| |
| |{{monster | id=1986 Tatacho}}
| |
| |-
| |
| |{{Monstro |id=2021}}
| |
| |139
| |
| |{{monster | id=2021 Phylla}}
| |
| |}
| |
| ===Illusion of Vampire (Nível 130) ===
| |
| No Nível 130 você poderá realizar as '''Quests Diárias''' da Illusion of Vampire
| |
|
| |
| * Send the Dead Back to Earth
| |
| *Sweet Dreams
| |
| *Unreliable Fake Blood
| |
| *Curious by Nature
| |
| *Studying in Dim Light
| |
| {| class="wikitablew-tr" style="width:30%; text-align:center"
| |
| !Mapa
| |
| !| Imagem
| |
| !Nível
| |
| !|Nome
| |
| |-
| |
| ! rowspan="7" |[[Arquivo:Gef d01 i.png|200x200px|Illusion of Vampire]]
| |
| |{{Monstro |id=3752}}
| |
| |130
| |
| |<span class="plainlinks">[https://www.divine-pride.net/database/monster/3752 Illusion Zombie]</span>
| |
| |-
| |
| |{{Monstro |id=3751}}
| |
| |133
| |
| |<span class="plainlinks">[http://www.divine-pride.net/database/monster/3751 Maldito Zombie]</span>
| |
| |-
| |
| |{{Monstro |id=3753}}
| |
| |136
| |
| |<span class="plainlinks">[http://www.divine-pride.net/database/monster/3753 Illusion Ghoul]</span>
| |
| |-
| |
| |{{Monstro |id=3750}}
| |
| |131
| |
| |<span class="plainlinks">[http://www.divine-pride.net/database/monster/3750 Matte Drainliar]</span>
| |
| |-
| |
| |{{Monstro |id=3754}}
| |
| |135
| |
| |<span class="plainlinks">[http://www.divine-pride.net/database/monster/3754 Sweet Nightmare]</span>
| |
| |-
| |
| |{{Monstro |id=3755}}
| |
| |130
| |
| |<span class="plainlinks">[http://www.divine-pride.net/database/monster/3755 Illusion Black Mushroom]</span>
| |
| |-
| |
| ||{{Monstro |id=3756}}
| |
| |137
| |
| |<span class="plainlinks">[http://www.divine-pride.net/database/monster/3756 Bomi]</span>
| |
| |}
| |
| *
| |
| |}
| |
|
| |
| = =
| |
| A Partir do nível 150, você poderá pegar as quests do '''Livro de Missões de Ouro''' no [[Grupo do Éden|Grupo Éden]].
| |
|
| |
| Ao completar as quests, você irá adquirir '''{{ItemB|id=6495 A}} Medalha de Mérito de Ouro''' que pode ser usada para trocar por equipamentos na [[Grupo do Éden#Lojas de Mérito|Loja de Mérito de Ouro]]
| |
|
| |
| Utilize o comando <code>'''@livrodeouro'''</code> para abrir as Missões do Livro de Ouro de onde quer que você esteja, com o comando você poderá pegar e entregar as quests de ouro.
| |
|
| |
| =Nível 150+=
| |
|
| |
| {| class="mw-collapsible mw-collapsed" style="background-color:#ffffff; width:100%"
| |
| ! style="background-color:#c8db93" | <big> </big>
| |
| |-
| |
| |
| |
| ===Illusion of Abyss (Nível 150) ===
| |
| No Nível 150 você poderá realizar as '''Quests Diárias''' da Illusion of Abyss
| |
|
| |
| *Remember not to Forget
| |
| *Empty Desire
| |
| * Endless Hunger
| |
| {| class="wikitablew-tr" style="width:30%; text-align:center"
| |
| !Mapa
| |
| !|Imagem
| |
| !Nível
| |
| !|Nome
| |
| |-
| |
| ! rowspan="5" |[[Arquivo:Tur d04 i.png|200x200px|Illusion of Abyss]]
| |
| |{{Monstro |id=3799}}
| |
| |160
| |
| |<span class="plainlinks">[https://www.divine-pride.net/database/monster/3799 Ominous Assaulter]</span>
| |
| |-
| |
| |{{Monstro |id=3800}}
| |
| |157
| |
| |<span class="plainlinks">[https://www.divine-pride.net/database/monster/3800 Ominous Permeter]</span>
| |
| |-
| |
| |{{Monstro |id=3801}}
| |
| |159
| |
| | <span class="plainlinks">[https://www.divine-pride.net/database/monster/3801 Ominous Freezer]</span>
| |
| |-
| |
| |{{Monstro |id=3802}}
| |
| |161
| |
| | <span class="plainlinks">[https://www.divine-pride.net/database/monster/3802 Ominous Solider]</span>
| |
| |-
| |
| |{{Monstro |id=3803}}
| |
| |162
| |
| |<span class="plainlinks">[https://www.divine-pride.net/database/monster/3803 Ominous Heater]</span>
| |
| |}
| |
|
| |
|
| |
| ===Illusion of Teddy Bear (Nível 150) ===
| |
| No Nível 150 você poderá realizar as '''Quests Diárias''' da Illusion of Teddy Bear
| |
|
| |
| *Run Away!!!
| |
| *Shouldn't Exist
| |
| *Let the Light Devour the Darkness
| |
| {| class="wikitablew-tr" style="width:30%; text-align:center"
| |
| !Mapa
| |
| !|Imagem
| |
| !Nível
| |
| !|Nome
| |
| |-
| |
| ! rowspan="8" |[[Arquivo:Ein d02 i.png|200x200px|Illusion of Teddy Bear]]
| |
| |{{Monstro |id=20255}}
| |
| |155
| |
| |<span class="plainlinks">[https://www.divine-pride.net/database/monster/20255 Red Teddy Bear]</span>
| |
| |-
| |
| |{{Monstro |id=20256}}
| |
| |155
| |
| |<span class="plainlinks">[https://www.divine-pride.net/database/monster/20256 Yellow Teddy Bear]</span>
| |
| |-
| |
| |{{Monstro |id=20257}}
| |
| |157
| |
| | <span class="plainlinks">[https://www.divine-pride.net/database/monster/20257 Green Teddy Bear]</span>
| |
| |-
| |
| |{{Monstro |id=20258}}
| |
| |155
| |
| |<span class="plainlinks">[https://www.divine-pride.net/database/monster/20258 White Teddy Bear]</span>
| |
| |-
| |
| |{{Monstro |id=20259}}
| |
| |152
| |
| |<span class="plainlinks">[https://www.divine-pride.net/database/monster/20259 Blue Teddy Bear]</span>
| |
| |-
| |
| |{{Monstro |id=20261}}
| |
| |154
| |
| | <span class="plainlinks">[https://www.divine-pride.net/database/monster/20261 Hardworking Pitman]</span>
| |
| |-
| |
| |{{Monstro |id=20262}}
| |
| |153
| |
| |<span class="plainlinks">[https://www.divine-pride.net/database/monster/20262 Soul Fragment]</span>
| |
| |-
| |
| | {{Monstro |id=20263}}
| |
| |156
| |
| |<span class="plainlinks">[https://www.divine-pride.net/database/monster/20263 Vicious Mind Haunted Obsidian]</span>
| |
| |}
| |
|
| |
|
| |
| ===Rudus (sp_rudus3)===
| |
| {| class="wikitablew-tr" style="width:30%; text-align:center"
| |
| !Mapa
| |
| !Imagem
| |
| !Nível
| |
| ! Nome
| |
| |- | |
| ! rowspan="4" |[[Arquivo:Sp rudus3.png|200x200px|Rudus 3]]
| |
| |{{Monstro |id=20362}}
| |
| |173
| |
| |{{monster|id=20362 Dolor}}
| |
| |-
| |
| |{{Monstro |id=20366}}
| |
| |175
| |
| |{{monster|id=20366 Twin Caput}}
| |
| |-
| |
| |{{Monstro |id=20364}}
| |
| |176
| |
| |{{monster|id=20364 Venenum}}
| |
| |-
| |
| |{{Monstro |id=20360}}
| |
| |178
| |
| |{{monster|id=20360 Plaga}}
| |
| |}
| |
| *
| |
| |}
| |
| =Nível 160 +=
| |
| {| class="mw-collapsible mw-collapsed" style="background-color:#ffffff; width:100%"
| |
| ! style="background-color:#c8db93" | <big> </big>
| |
| |-
| |
| |
| |
| === Illusion of Luanda (Nível 160) ===
| |
| No Nível 160 você poderá realizar as '''Quests Diárias''' da Illusion of Luanda
| |
|
| |
| *Proof of Megalith Extermination
| |
| *Proof of Wootan Extermination
| |
| *Megalith Hunt
| |
| *Wootan Hunt
| |
| {| class="wikitablew-tr" style="width:30%; text-align:center"
| |
| !Mapa
| |
| !|Imagem
| |
| !Nível
| |
| !|Nome
| |
| |- | | |- |
| ! rowspan="6" |[[Arquivo:Com d02 i.png|200x200px|Illusion of Luanda]] | | ! style="background-color:#d5e3ff; text-align: center; width:10%" |Nível |
| |{{Monstro |id=20270}}
| | ! style="background-color:#d5e3ff; text-align: center; width:10%" |Onde Upar |
| |164 | | ! colspan="11" style="background-color:#d5e3ff; text-align: center;" |Mobs |
| |<span class="plainlinks">[https://www.divine-pride.net/database/monster/20270 Ancient Tri Joint]</span>
| |
| |- | | |- |
| |{{Monstro |id=20271}} | | !rowspan="2" |260 à 275 |
| |167 | | !Niflheim Pumpkin Farm |
| |<span class="plainlinks">[https://www.divine-pride.net/database/monster/20271 Ancient Stalactic Golem]</span> | | (requer Nv. 230) |
| | | style="vertical-align:bottom; text-align:center" |{{Monstro|id=22383|monstro=<br>Violen}}{{monster|id=22383 Violen}} |
| | | style="vertical-align:bottom; text-align:center" |{{Monstro|id=22384|monstro=<br>Violen}}{{monster|id=22384 CP_Violen}} |
| | | style="vertical-align:bottom; text-align:center" |{{Monstro|id=22385|monstro=<br>Spiding}}{{monster|id=22385 Spiding}} |
| | | style="vertical-align:bottom; text-align:center" |{{Monstro|id=22386|monstro=<br>Spiding}}{{monster|id=22386 CP_Spiding}} |
| | | style="vertical-align:bottom; text-align:center" |{{Monstro|id=22387|monstro=<br>Garling}}{{monster|id=22387 Garling}} |
| | | style="vertical-align:bottom; text-align:center" |{{Monstro|id=22388|monstro=<br>Garling}}{{monster|id=22388 CP_Garling}} |
| | | style="vertical-align:bottom; text-align:center" |{{Monstro|id=22389|monstro=<br>Jackonette}}{{monster|id=21952 Jackonette}} |
| | | style="vertical-align:bottom; text-align:center" |{{Monstro|id=22390|monstro=<br>Jackonette}}{{monster|id=22390 CP_Jackonette}} |
| | | style="vertical-align:bottom; text-align:center" |{{Monstro|id=22391|monstro=<br>Liamette}}{{monster|id=22391 Liamette}} |
| | | style="vertical-align:bottom; text-align:center" |{{Monstro|id=22392|monstro=<br>Liamette}}{{monster|id=22392 CP_Liamette}} |
| | | style="vertical-align:bottom; text-align:center" |{{Monstro|id=22394|monstro=<br>Nightmare Piamette}}{{monster|id=22394 Nightmare Piamette}} |
| | '''MVP''' |
| |- | | |- |
| |{{Monstro |id=20272}}
| | !Ancient Temple Akhet |
| |166
| | (requer Nv. 250) |
| |<span class="plainlinks">[https://www.divine-pride.net/database/monster/20272 Ancient Megalith]</span>
| | | style="vertical-align:bottom; text-align:center" |{{Monstro|id=22395|monstro=<br>Medjed}}{{monster|id=22395 Medjed}} |
| |-
| | | style="vertical-align:bottom; text-align:center" |{{Monstro|id=22396|monstro=<br>Medjed}}{{monster|id=22396 CP_Medjed}} |
| |{{Monstro |id=20274}}
| | | style="vertical-align:bottom; text-align:center" |{{Monstro|id=22401|monstro=<br>Heka}}{{monster|id=22401 Heka}} |
| |166
| | | style="vertical-align:bottom; text-align:center" |{{Monstro|id=22402|monstro=<br>Heka}}{{monster|id=22402 CP_Heka}} |
| |<span class="plainlinks">[https://www.divine-pride.net/database/monster/20274 Ancient Stone Shooter]</span>
| | | style="vertical-align:bottom; text-align:center" |{{Monstro|id=22397|monstro=<br>Medjay}}{{monster|id=22397 Medjay}} |
| |-
| | | style="vertical-align:bottom; text-align:center" |{{Monstro|id=22398|monstro=<br>Medjay}}{{monster|id=22398 CP_Medjay}} |
| |{{Monstro |id=20275}}
| | | style="vertical-align:bottom; text-align:center" |{{Monstro|id=22399|monstro=<br>Ophois}}{{monster|id=22399 Ophois}} |
| |164
| | | style="vertical-align:bottom; text-align:center" |{{Monstro|id=22400|monstro=<br>Timbers}}{{monster|id=22400 CP_Ophois}} |
| |<span class="plainlinks">[https://www.divine-pride.net/database/monster/20275 Ancient Wootan Shooter]</span>
| | | style="vertical-align:bottom; text-align:center" |{{Monstro|id=22404|monstro=<br>Guide of Dead}}{{monster|id=22404 Guide of Dead}} |
| |-
| | '''MVP''' |
| |{{Monstro |id=20276}}
| |
| |167
| |
| |<span class="plainlinks">[https://www.divine-pride.net/database/monster/20276 Ancient Wootan Fighter]</span>
| |
| |}
| |
| ===Rudus (sp_rudus3)===
| |
| Mapa 150+, mas você ainda pode continuar aqui se quiser
| |
| {| class="wikitablew-tr" style="width:30%; text-align:center"
| |
| !Mapa
| |
| !Imagem
| |
| ! Nível
| |
| !Nome
| |
| |-
| |
| ! rowspan="4" |[[Arquivo:Sp rudus3.png|200x200px|Rudus 3]]
| |
| |{{Monstro |id=20362}} | |
| |173 | |
| |{{monster|id=20362 Dolor}}
| |
| |-
| |
| |{{Monstro |id=20366}}
| |
| |175
| |
| |{{monster|id=20366 Twin Caput}}
| |
| |-
| |
| |{{Monstro |id=20364}}
| |
| |176
| |
| |{{monster|id=20364 Venenum}}
| |
| |-
| |
| |{{Monstro |id=20360}}
| |
| |178
| |
| |{{monster|id=20360 Plaga}}
| |
| |} | |
| *
| |
| |}
| |
| =Nível 170+=
| |
| {| class="mw-collapsible mw-collapsed" style="background-color:#ffffff; width:100%"
| |
| ! style="background-color:#c8db93" | <big> </big>
| |
| |-
| |
| |
| |
| === Illusion of Labyrinth ===
| |
| No Nível 160 você poderá realizar as '''Quests Diárias''' da Illusion of Labyrinth, além disso você pode aproveitar para upar nos monstros do mapa
| |
| *Training Requests
| |
| *#Andrea's Revenge 1
| |
| *#Andrea's Revenge 2
| |
| *#Ane's Revenge 1
| |
| *#Ane's Revenge 2
| |
| *#Silvano's Revenge 1
| |
| *#Silvano's Revenge 2
| |
| *#Cecilia's Revenge 1
| |
| *#Cecilia's Revenge 2
| |
| *Purification
| |
| {| class="wikitablew-tr" style="width:30%; text-align:center"
| |
| !Mapa
| |
| !Imagem
| |
| !Nível
| |
| ! Nome
| |
| |-
| |
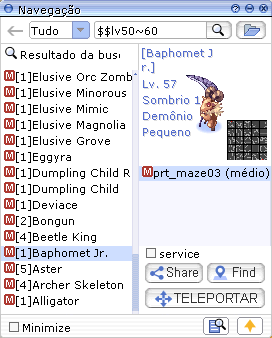
| ! rowspan="8" |[[Arquivo:Prt mz03 i.png|200x200px|Illusion of Labyrinth]]
| |
| |{{Monstro |id=20532}} | |
| |172
| |
| |{{monster|id=20532 Chaotic Stem Worm}} | |
| |-
| |
| |{{Monstro |id=20529}}
| |
| |173
| |
| |{{monster|id=20529 Chaos Ghostring}}
| |
| |-
| |
| |{{Monstro |id=20531}}
| |
| |173
| |
| |{{monster|id=20531 Chaos}}
| |
| |-
| |
| |{{Monstro |id=20528}}
| |
| |174
| |
| |{{monster|id=20528 Chaos Mantis}}
| |
| |-
| |
| |{{Monstro |id=20527}}
| |
| |175
| |
| |{{monster|id=20527 Chaos Hunter Fly}}
| |
| |-
| |
| |{{Monstro |id=20526}}
| |
| |176
| |
| |{{monster|id=20526 Chaos Side Winder}}
| |
| |-
| |
| |{{Monstro |id=20525}}
| |
| |177
| |
| |{{monster|id=20525 Chaos Baphomet Jr.}}
| |
| |-
| |
| |{{Monstro |id=20530}}
| |
| |177
| |
| |{{monster|id=20530 Chaos Killer Mantis}}
| |
| |}
| |
| *Ao alcançar o nível 170 você pode acessar a instância Edda Biosearch Laboratory, que concede grandes quantidades de experiência ao matar os monstros espalhados pela instância. Essa instância só pode ser feita 1x por dia.
| |
| *'''<u>Observação:</u>''' Os monstros causam bastante dano e possuem alta esquiva. Leve itens de ressurreição e garanta uma boa taxa de acerto. Caso considere que seu personagem ainda não esteja forte o suficiente, é recomendável formar um grupo para aumentar suas chances de concluir a instância.
| |
| {{Instância|Nome=EDDA Bioresearch Laboratory|Imagem=EDDA Bioresearch Laboratory|Level=170|Cooldown=Após a Meia-Noite|Descrição=Relembre os eventos ocorridos nos<br>experimentos de Rekenber|Link=EDDA Bioresearch Laboratory}}
| |
| |- | |
| |
| |
| |}
| |
| =Nível 175+=
| |
| {| class="mw-collapsible mw-collapsed" style="background-color:#ffffff; width:100%"
| |
| ! style="background-color:#c8db93" | <big> </big>
| |
| |-
| |
| |
| |
| === Caverna de Magma (mag_dun03) ===
| |
| {| class="wikitablew-tr" style="width:30%; text-align:center"
| |
| !Mapa
| |
| !Imagem
| |
|
| |
| !Nível
| |
| !Nome
| |
| |- | |
| ! rowspan="7" |[[Arquivo:Mag dun02.png|200x200px|Caverna de Magma 3]]
| |
| |<center>{{Monstro |id=20376}}</center>
| |
| |171 | |
| |{{monster|id=20376 Rigid Explosion}}
| |
| |-
| |
| |<center>{{Monstro |id=20375}}
| |
| |173
| |
| |{{monster|id=20375 Rigid Earth Deleter}}
| |
| |- | |
| |<center>{{Monstro |id=20377}}</center>
| |
| |173
| |
| |{{monster|id=20377 Rigid Kaho}}
| |
| |-
| |
| |{{Monstro |id=20374}}
| |
| |174
| |
| |{{monster|id=20374 Rigid Sky Deleter}}
| |
| |-
| |
| |<center>{{Monstro |id=20378}}</center>
| |
| |177
| |
| |{{monster|id=20378 Rigid Lava Golem}}
| |
| |-
| |
| |{{Monstro |id=20372}}
| |
| |178
| |
| |{{monster|id=20372 Rigid Blazer}}
| |
| |-
| |
| |{{Monstro |id=20373}}
| |
| |179
| |
| |{{monster|id=20373 Rigid Nightmare Terror}}
| |
| |}
| |
| *
| |
| |}
| |
| =Nível 185+=
| |
| {| class="mw-collapsible mw-collapsed" style="background-color:#ffffff; width:100%"
| |
| ! style="background-color:#c8db93" | <big> </big>
| |
| |-
| |
| |
| |
| === Calabouço da Mina (ein_dun02) ===
| |
| {| class="wikitablew-tr" style="width:30%; text-align:center"
| |
| !Mapa
| |
| !Imagem
| |
| !Nível
| |
| ! Nome
| |
| |-
| |
| ! rowspan="10" |[[Arquivo:Ein dun03.png|200x200px|Calabouço da Mina]]
| |
| |{{Monstro |id=20592}} | |
| |188 | |
| |{{monster|id=20592 Poisonous}}
| |
| |-
| |
| |{{Monstro |id=20593}}
| |
| |188
| |
| |{{monster|id=20593 Toxious}}
| |
| |- | |
| |{{Monstro |id=20602}}
| |
| |188
| |
| |{{monster|id=20602 White Porcellio}}
| |
| |-
| |
| |{{Monstro |id=20594}}
| |
| |190
| |
| |{{monster|id=20594 Green Mineral}}
| |
| |-
| |
| |{{Monstro |id=20595}}
| |
| |190
| |
| |{{monster|id=20595 Red Mineral}}
| |
| |-
| |
| |{{Monstro |id=20596}}
| |
| |190
| |
| |{{monster|id=20596 White Mineral}}
| |
| |-
| |
| |{{Monstro |id=20597}}
| |
| |190
| |
| |{{monster|id=20597 Purple Mineral}}
| |
| |-
| |
| |{{Monstro |id=20603}}
| |
| |190
| |
| |{{monster|id=20603 Abyssman}}
| |
| |-
| |
| |{{Monstro |id=20598}}
| |
| |191
| |
| |{{monster|id=20598 Jeweliant}}
| |
| |-
| |
| |{{Monstro |id=20600}}
| |
| |192
| |
| |{{monster|id=20600 Jewel}}
| |
| |}
| |
| ===Odin's Past (odin_past)===
| |
| {| class="wikitablew-tr" style="width:30%; text-align:center"
| |
| !Mapa
| |
| !Imagem
| |
|
| |
| !Nível
| |
| !Nome
| |
| |-
| |
| ! rowspan="6" |[[Arquivo:Odin past.png|200x200px|Odin's Past]]
| |
| |<center>{{Monstro |id=20604}}</center>
| |
| |188
| |
| |{{monster|id=20604 Angelgolt}} | |
| |-
| |
| |<center>{{Monstro |id=20605}}</center>
| |
| |188
| |
| |{{monster|id=20605 Angelgolt}}
| |
| |- | |
| |<center>{{Monstro |id=20609}}</center>
| |
| |188
| |
| |{{monster|id=20609 Spectral Plasma}}
| |
| |-
| |
| |{{Monstro |id=20608}}
| |
| |190
| |
| |{{monster|id=20608 Arch Plasma}}
| |
| |-
| |
| |{{Monstro |id=20606}}
| |
| |190
| |
| |{{monster|id=20606 Holy Frus}}
| |
| |-
| |
| |<center>{{Monstro |id=20607}}</center>
| |
| |190
| |
| |{{monster|id=20607 Holy Skogul}}
| |
| |}
| |
| *
| |
| |}
| |
|
| |
| = =
| |
| A Partir do nível 190, você poderá pegar as quests do '''Livro de Missões de Platina''' no [[Grupo do Éden|Grupo Éden]].
| |
|
| |
| Ao completar as quests, você irá adquirir '''{{ItemB|id=6495 V}} Medalha de Mérito de Platina''' que pode ser usada para trocar por equipamentos na [[Grupo do Éden#Lojas de Mérito|Loja de Mérito de Platina]]
| |
|
| |
| Utilize o comando <code>'''@livrodeplatina'''</code> para abrir as Missões do Livro de Platina de onde quer que você esteja, com o comando você poderá pegar e entregar as quests de platina.
| |
|
| |
| =Nível 190+=
| |
|
| |
| {| class="mw-collapsible mw-collapsed" style="background-color:#ffffff; width:100%"
| |
| ! style="background-color:#c8db93" | <big> </big>
| |
| |-
| |
| |
| |
| === Lago do Abismo (Abyss_04) ===
| |
| {| class="wikitablew-tr" style="width:30%; text-align:center"
| |
| !Map
| |
| !Imagem
| |
| !Nível
| |
| ! Nome
| |
| |-
| |
| ! rowspan="6" |[[Arquivo:Abyss 04.png|200x200px|Abyss 4]]
| |
| |{{Monstro |id=20612}} | |
| |202 | |
| |{{monster|id=20612 Purple Ferus}}
| |
| |-
| |
| |{{Monstro |id=20613}}
| |
| |204
| |
| |{{monster|id=20613 Treasure Mimic}}
| |
| |-
| |
| |{{Monstro |id=20614}}
| |
| |205
| |
| |{{monster|id=20614 Black Acidus}}
| |
| |- | |
| |{{Monstro |id=20615}}
| |
| |205
| |
| |{{monster|id=20615 Silver Acidus}}
| |
| |-
| |
| |{{Monstro |id=20616}}
| |
| |206
| |
| |{{monster|id=20616 Bone Ferus}}
| |
| |-
| |
| |{{Monstro |id=20617}}
| |
| |206
| |
| |{{monster|id=20617 Bone Acidus}}
| |
| |}
| |
| *
| |
| |}
| |
|
| |
| =Nível 200+=
| |
| {| class="mw-collapsible mw-collapsed" style="background-color:#ffffff; width:100%"
| |
| ! style="background-color:#c8db93" | <big> </big>
| |
| |-
| |
| |
| |
| === Dead Man's Banquet Hall (nif_dun01) ===
| |
| {| class="wikitablew-tr" style="width:30%; text-align:center"
| |
| !Mapa
| |
| !Imagem
| |
| !Nível
| |
| ! Nome
| |
| |-
| |
| ! rowspan="4" |[[Arquivo:Nif dun01.png|200x200px|Dead Man's Banquet Hall]]
| |
| |{{Monstro |id=20938}}
| |
| |213
| |
| |{{monster|id=20938 Ghost Cube}}
| |
| |-
| |
| |{{Monstro |id=20939}} | |
| |213
| |
| |{{monster|id=20939 Lude Gal}}
| |
| |-
| |
| |{{Monstro |id=20937}}
| |
| |214
| |
| |{{monster|id=20937 Brutal Murderer}}
| |
| |- | |
| |{{Monstro |id=20935}}
| |
| |214
| |
| |{{monster|id=20935 Gan Ceann}}
| |
| |}
| |
|
| |
| === Rudus 4 ===
| |
| {| class="wikitablew-tr" style="width:30%; text-align:center"
| |
| !Mapa
| |
| !Imagem
| |
| !Nível
| |
| ! Nome
| |
| |-
| |
| ! rowspan="5" |[[Arquivo:Sp rudus4.png|200x200px|Rudus 4]]
| |
| |{{Monstro |id=20929}}
| |
| |213
| |
| |{{monster|id=20929 Giant Caput}}
| |
| |-
| |
| |{{Monstro |id=20933}} | |
| |213 | |
| |{{monster|id=20933 Venedi}}
| |
| |-
| |
| |{{Monstro |id=20930}}
| |
| |214
| |
| |{{monster|id=20930 Dolorian}}
| |
| |-
| |
| |{{Monstro |id=20932}}
| |
| |214
| |
| |{{monster|id=20932 Deadre}}
| |
| |-
| |
| |{{Monstro |id=20931}}
| |
| |215
| |
| |{{monster|id=20931 Plagarion}}
| |
| |}
| |
| *
| |
| |}
| |
|
| |
| =Nível 215+=
| |
| {| class="mw-collapsible mw-collapsed" style="background-color:#ffffff; width:100%"
| |
| ! style="background-color:#c8db93" | <big> </big>
| |
| |-
| |
| |
| |
| === Amicitia 1 ===
| |
| {| class="wikitablew-tr" style="width:30%; text-align:center"
| |
| !Map
| |
| !Imagem
| |
| !Nível
| |
| ! Nome
| |
| |-
| |
| ! rowspan="4" |[[Arquivo:Amicitia1.png|centro|200x200px]]
| |
| |{{Monstro |id=20924}}
| |
| |213
| |
| |{{monster|id=20924 Amitera}}
| |
| |-
| |
| |{{Monstro |id=20925}}
| |
| |228
| |
| |{{monster|id=20925 Litus}}
| |
| |-
| |
| |{{Monstro |id=20926}}
| |
| |229
| |
| |{{monster|id=20926 Fillia}}
| |
| |-
| |
| |{{Monstro |id=20927}}
| |
| |230
| |
| |{{monster|id=20927 Vanilaqus}}
| |
| |}
| |
| *
| |
| |} | |
| =Nível 230+=
| |
| {| class="mw-collapsible mw-collapsed" style="background-color:#ffffff; width:100%"
| |
| ! style="background-color:#c8db93" | <big> </big>
| |
| |-
| |
| |
| |
| === Amicitia 2 ===
| |
| {| class="wikitablew-tr" style="width:30%; text-align:center"
| |
| !Map
| |
| !Imagem
| |
| !Nível
| |
| ! Nome
| |
| |-
| |
| ! rowspan="4" |[[Arquivo:Amicitia2.png|centro|200x200px]]
| |
| |{{Monstro |id=20920}}
| |
| |243
| |
| |{{monster|id=20920 Lavaeter}}
| |
| |-
| |
| |{{Monstro |id=20921}}
| |
| |244
| |
| |{{monster|id=20921 Fulgor}}
| |
| |-
| |
| |{{Monstro |id=20922}}
| |
| |244
| |
| |{{monster|id=20922 Napeo}}
| |
| |-
| |
| |{{Monstro |id=20923}} | |
| |230
| |
| |{{monster|id=20923 Galensis}}
| |
| |}
| |
| |}
| |
|
| |
| =Nível 240+=
| |
| {| class="mw-collapsible mw-collapsed" style="background-color:#ffffff; width:100%"
| |
| ! style="background-color:#c8db93" | <big> </big>
| |
| |-
| |
| |
| |
| === Collapsed Opera House (nif_dun02) ===
| |
| {| class="wikitablew-tr" style="width:30%; text-align:center"
| |
| !Mapa
| |
| !Imagem
| |
| !Nível
| |
| ! Nome
| |
| |-
| |
| ! rowspan="4" |[[Arquivo:Nif dun02.png|200x200px|Collapsed Opera House]]
| |
| |{{Monstro |id=20941}}
| |
| |253
| |
| |{{monster|id=20941 Grote}}
| |
| |-
| |
| |{{Monstro |id=20936}}
| |
| |254
| |
| |{{monster|id=20936 Disguiser}}
| |
| |-
| |
| |{{Monstro |id=20940}}
| |
| |255
| |
| |{{monster|id=20940 Blue Moon Loli}}
| |
| |-
| |
| |{{Monstro |id=20942}}
| |
| |255
| |
| |{{monster|id=20942 Pierrotzoist}}
| |
| |}
| |
| |} | | |} |
| </center> | | </center> |

 Medicina Milagrosa é possível chegar no nível de base 100+ rápidamente.